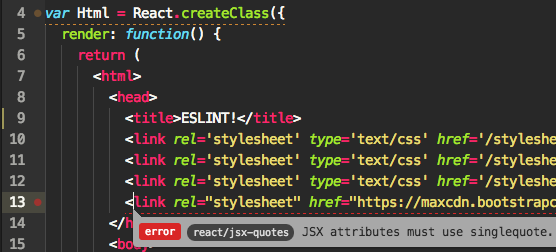
What are linter?
- 4 minsWhat are linters?
Linters? I also don’t know? Let’s google it.
a machine for removing the short fibres from cotton seeds after ginning.
In the similar way they remove errors from code. They can detect potential bugs, as well as code styles which are difficult to maintain. This are automated tools, no manual work is needed to run once they have been successfully set up. Some of the useful linters are
- JSLint (for javascript)
- CSSLint (for CSS)
- JSHint (for javascript)
- Pylint (for Python)
- you can find such tools for other languages too. Let’s explore more on one such tool
ESLint.ESLintis an open source JS listing tool created by Nicholas C. Zakas. Here we will set up this in our code editor.
here are basically two types of setup.
- Editor specific
- Install Linter package and plug ESLint into it.
- Project specific
- Create a config file which will consists of all your lint rules.
Here are steps to install it in different editors.
- in Atom editor.
- steps:
- Open editor preferences.
- Click on install tab.
- search for
linter-eslint(install it) - search for
linter. (install it)
Editor specific setup is now completed.
Now for project specific one (I usually write react-native code in JS, thus taking a example of RN project)
- Open project directory in terminal.
- Install a npm package by
npm install --save-dev eslint-config-rallycoding
- Install a npm package by
- Add a configuration file.
- Create a new file in project dir and name it
.eslintrcand paste this lines{ “extends”: “rallycoding” }
- Create a new file in project dir and name it
(This will tell
ESLintto go and use configuration that we have just installed. Note currently we are defining whole rule, we are using rules present in `eslint-config-rallycoding’)Done with the setup. Now reopen file to get started.
- steps:
- setup with Sublime text 3 (sublime text 2 doesn’t support) Follow following steps :
- Install eslint globally with NPM.
- run
npm install -g eslintin terminal inside project directory. (This will installESLintpackage globally).
- run
- Install Package Control (it is package manager for sublime 3).
- Open https://packagecontrol.io/installation in browser.
- Copy code block from
importtowrite. - Paste this in sublime console.
- Go to View tab on the top, click show console.
- Paste it and hit enter key.
- Install
linterandeslintthrough package manager we just install.- For installing linter
- In sublime text, hit
command/ctrl + shift + p. - Search for install package option. Select it.
- Now search for
SublimeLinter, select it to install.
- In sublime text, hit
- Now install
eslint- In sublime text, hit command + shift + p.
- Search for install package option. Select it.
- Now search for
SublimeLinter-contrib-eslint, select it to install.
- Install a config with NPM.
- run
npm install --save-dev eslint-config-rallycodingin the terminal inside project directory.
- run
- Create a new file in project dir and name it .eslintrc and paste following lines in to it.
{ “extends”: “rallycoding” }
- For installing linter
Done with the installation part. Now reopen sublime text to get started with eslint.
- Install eslint globally with NPM.
- setup with VSCode. Follow following steps :
- Install eslint globally with NPM.
- run
npm install -g eslintin terminal inside project directory. (This will installeslintpackage globally).
- run
- On the left hand side, click on packages option, search for
ESLintand then click on install button. After installing enableESLintextension. - run
npm install --save-dev eslint-config-rallycodingin the terminal inside project directory. - Create a new file in project dir and name it .eslintrc and paste following lines in to it.
{ “extends”: “rallycoding” }
Great! done with the installation part.
- Install eslint globally with NPM.
- want to setup
ESLintfor Vim editor? This awesome article by David Qorashi will guide you. In the above setup we have used somerallycodingESLint rules, you can use others set of rules as well.
Final thought
Linters are very useful and simple solution for basic syntax checking. They will not only save you time, but will also make you write better code. (complied all this stuff from various sites)
Have a nice day!
